Camera calibration
For many applications of deep learning and machine learning, we need to estimate the intrinsic parameters of our camera (radial distortion coefficients: k1,k2,(k3), tangential distortion coefficients: p1,p2, focal lengths: fx,fy and optical centers: cx, cy). These parameters are needed to undistort the image which for example is required to run the SLAM demos. Note that if your camera has a lens with manual focus, camera calibration has to be run every time the lens is manipulated.
OpenCV has a tutorial with code to do this here. The approach we use here is from this tutorial. It uses the chess pattern. Other patterns: e.g. circles, ChArUco, AprilTags with different advantages are also possible but not supported in the code for this tutorial. More advanced camera calibration software such as Kalibr can also be used. If you want to calibrate between a camera and an IMU, Kalibr is a good approach.
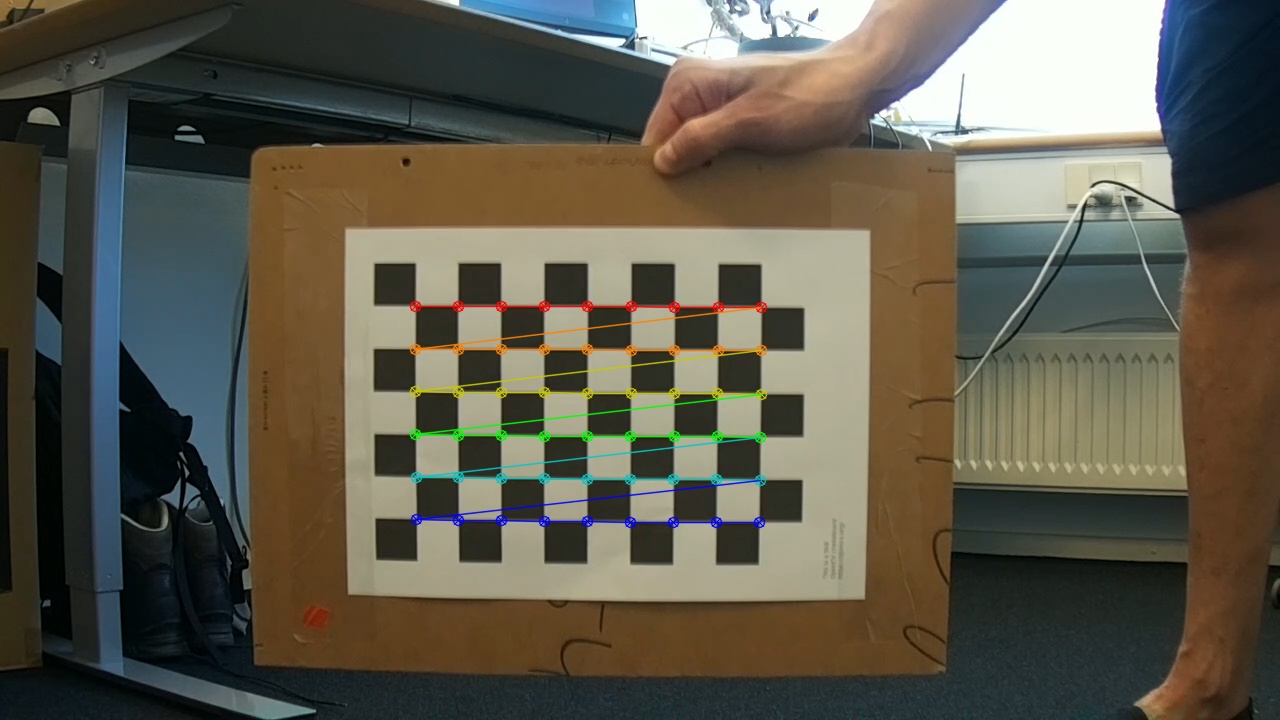
In this tutorial, we just print out the chess pattern on A4 paper and attach to a flat hard surface. It is fine as a starting point. To increase accuracy of the calibration, it is recommended to have this pattern printed directly on a larger flat hard surface.
The code for this tutorial is in the following GitHub repository.
First print chess_pattern.png and attach it to a flat hard surface. Then make sure the camera is running and you can receive a stream for it. Next run:
python record.py
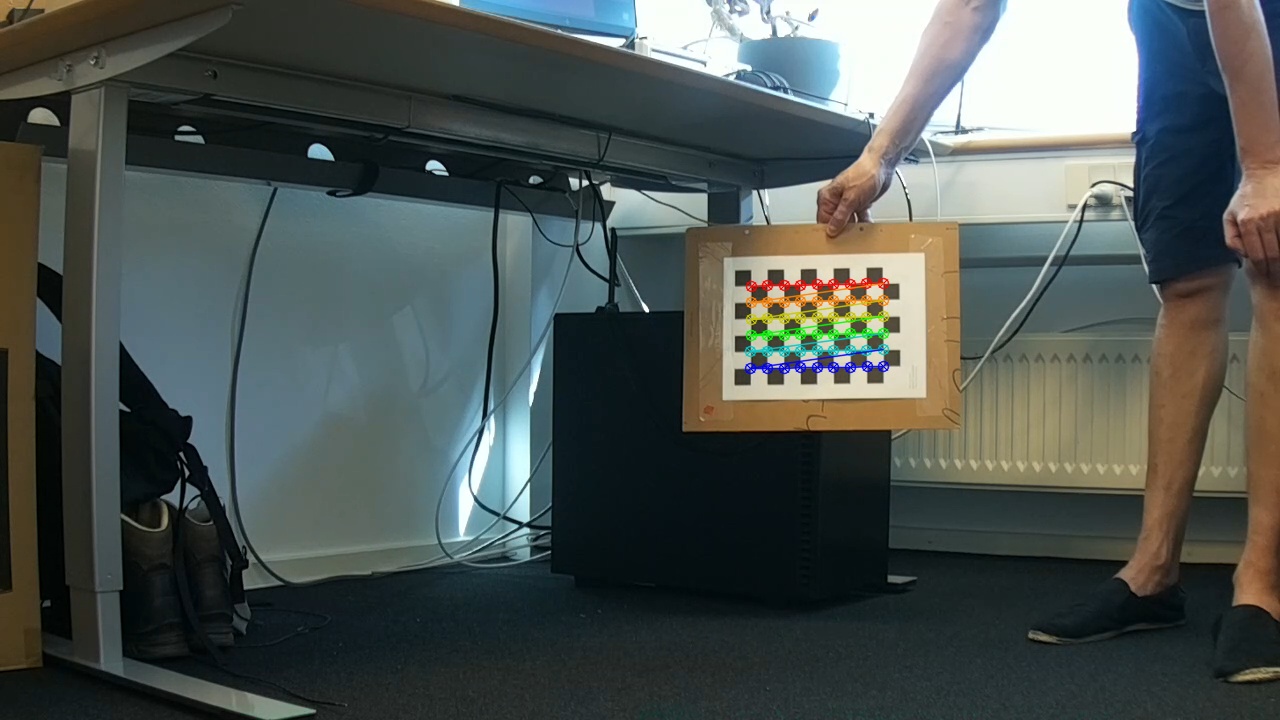
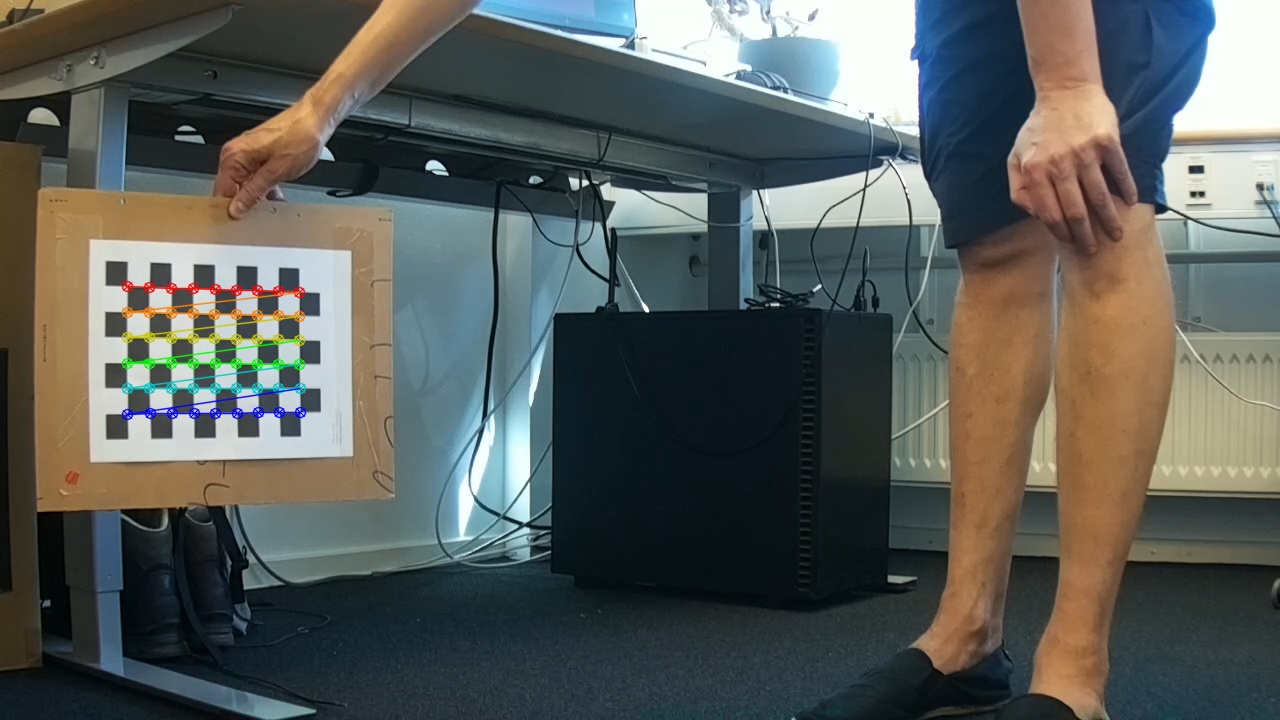
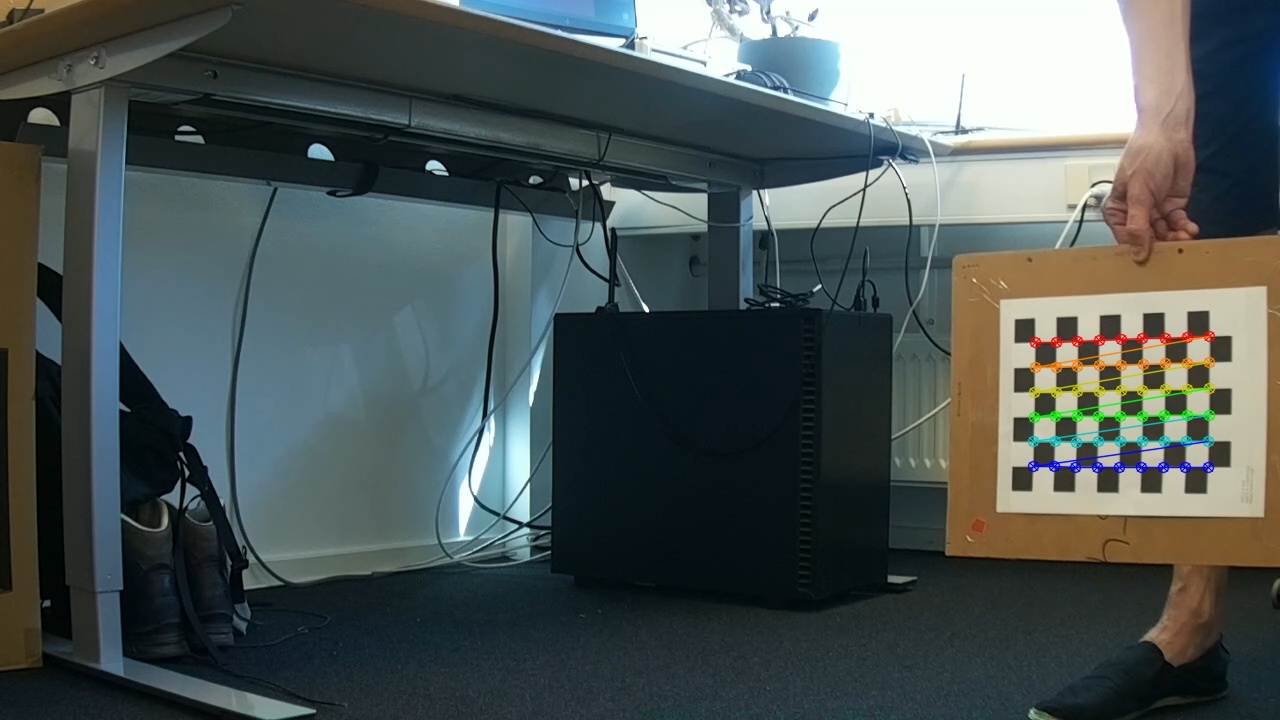
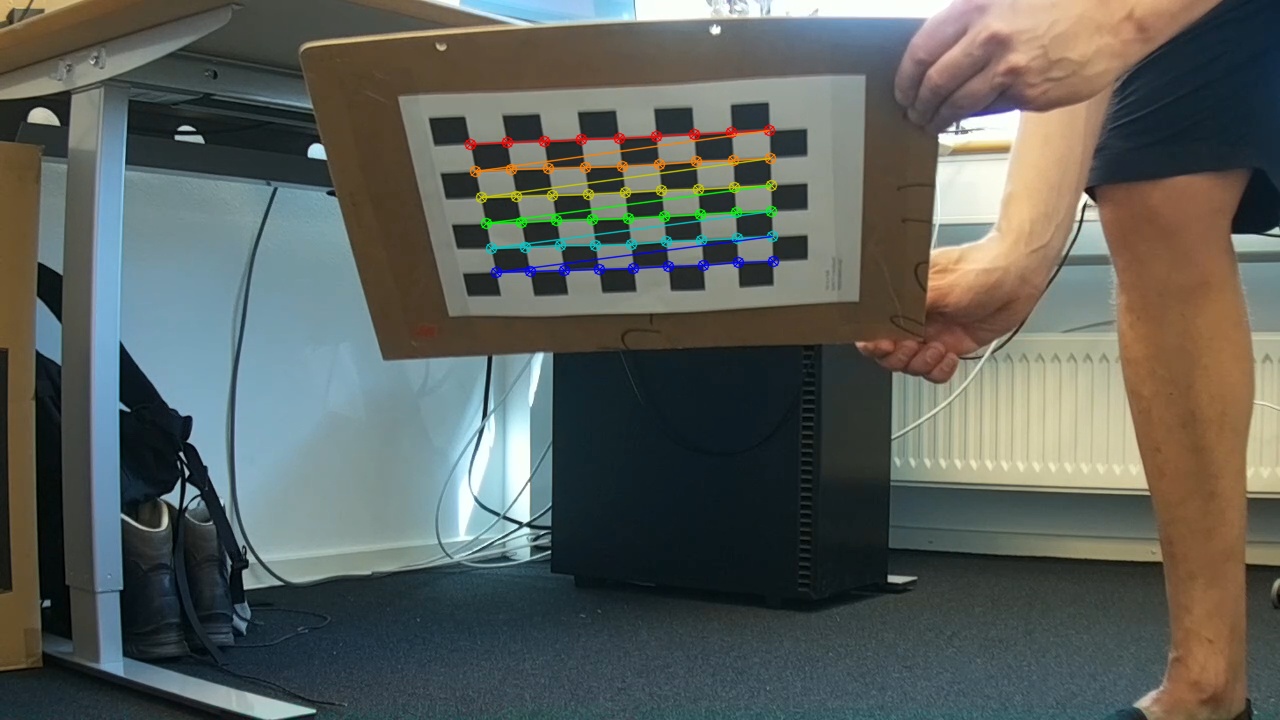
Place the chess pattern in front of the camera in different positions and orientations. Press SPACE key to record a snapshot image to the folder ./outputs For this tutorial we took 14 images located here.
6 of these images (with chess board detections drawn) are shown below. The remaining images with chess board detections drawn on top are located here.

To get chess board detections for your images and to estimate intrinsic camera parameters, run
python calib.py --folder ./outputs
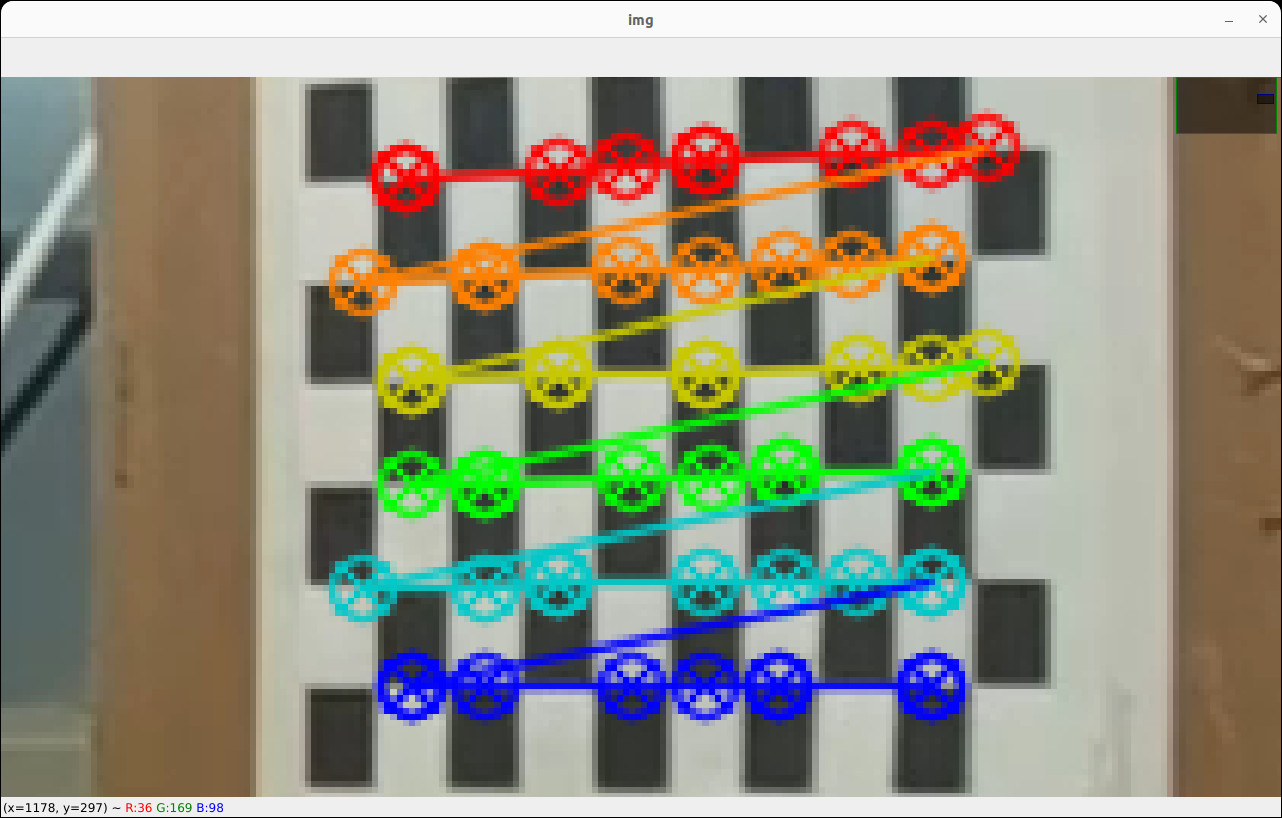
Now it is important to inspect the chess board detection for every image to see if any of the detections are not well positioned on the corners of the chess board. We recommend to zoom into the chess board to get a good look. To help spot bad detections, calib.py at the end plots the error for each image in a bar plot:
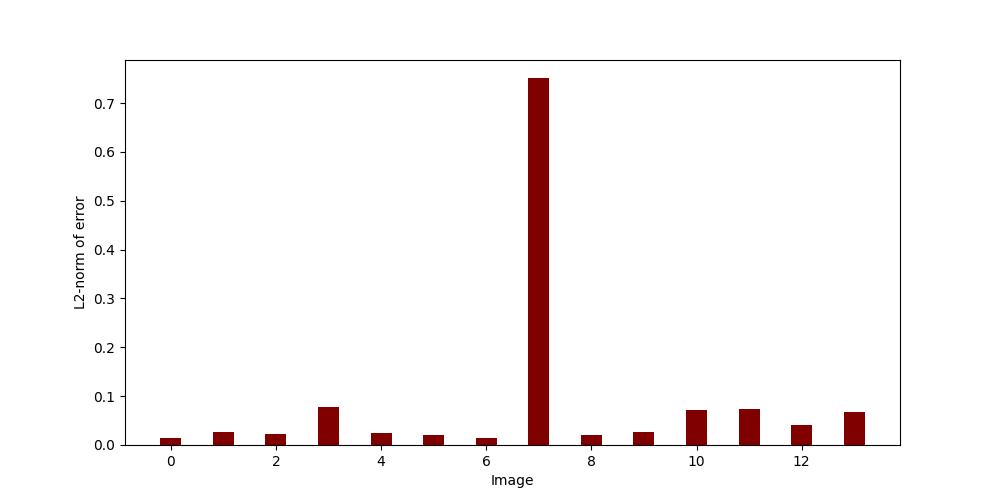
Clearly something is wrong with image 7. We inspect the detection for image 7 and conclude it is bad. 
In the top of calib.py is an array called ignores = []. We add image 7 to this array:
ignores = ['000007']
and rerun calib.py. Now we get a more even distribution of errors with satisfying low error for each image: 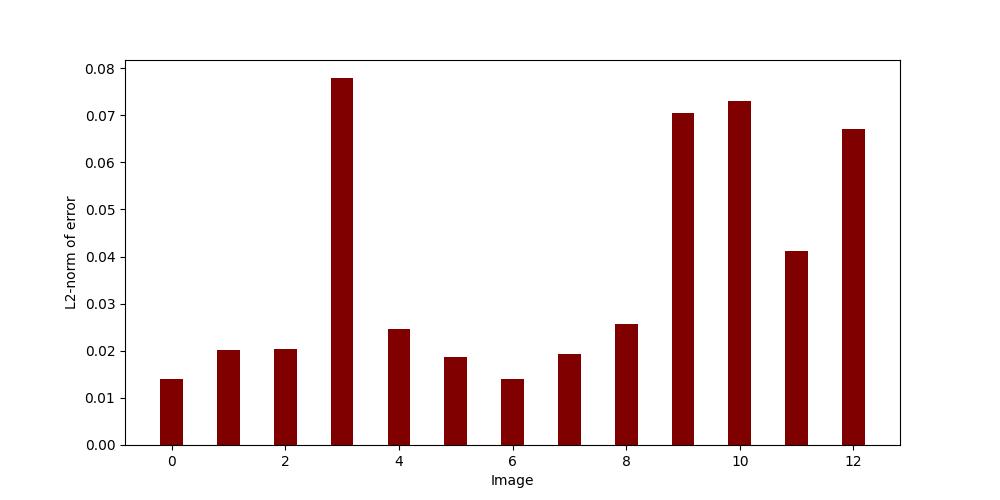 After inspecting the chess board detection for each image, we are satisfied with these 13 images. calib.py has outputted the intrinsic camera parameters in the terminal:
mtx [[1600.0690979878923     0.                626.5647839949387 ]
 [   0.               1598.1783654836072   277.12515421330653]
 [   0.                  0.                  1.              ]]
dist [[-0.4569215133727014 -0.293205835183599   0.0075889981526405
  -0.0015584514439296  1.7397888801204173]]
Meaning we have the following estimates for the intrinsic camera parameters:
fx=1600.0690979878923
fy=1598.1783654836072
cx=626.5647839949387
cx=277.12515421330653
k1=-0.4569215133727014
k2=-0.293205835183599
p1=0.0075889981526405
p2=-0.0015584514439296
k3=1.7397888801204173
Note that we have not used the refined estimates (for a specific resolution) provided by:
newcameramtx, roi = cv2.getOptimalNewCameraMatrix(mtx, dist, (w,h), 1, (w,h))
The intrinsic camera parameters can now be used for running the monocular SLAM demos.